
Start by prepping the seating area and adjusting the seat to expose the hidden areas underneath. Using a bristle brush, sweep out the dirt. Use a vacuum to get rid of smaller dust particles and steam clean your seats.
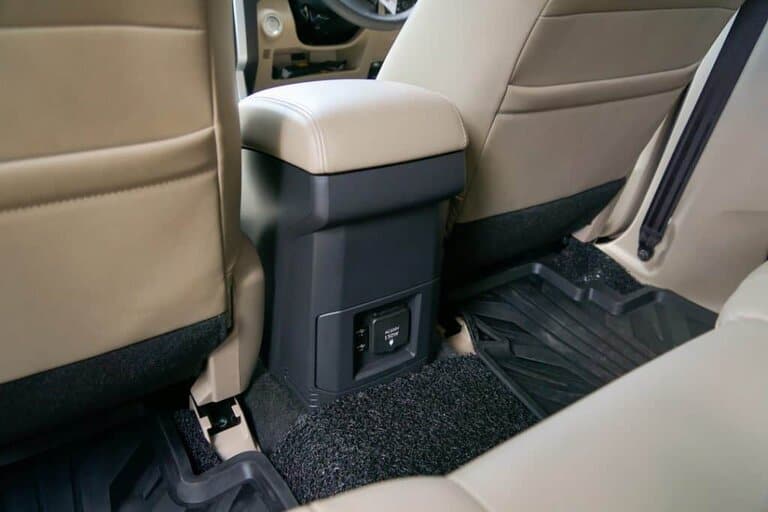
When it comes to cars, the carpets may be the dirtiest part, but in-between the seats are definitely the most challenging parts to reach. The area between the center consoles is home to wrappers, coins, and grime that we just can’t reach with our hands.
It gets even worse when your kid throws up all over the car or you’ve not had the chance to give the car a proper cleaning in months. Before you give up on having a clean space between your seats.
Contrary to what some people think, you do not have to remove your car seats before cleaning out this space properly. You also don’t have to take your car to the washers for this process either.
You can do it with tools you already have lying around your house. Here are a few methods to deep clean your car space effectively.

How To Clean Between Car Seats
The right tools will make your cleaning faster and more effective, especially when you have to creep into the crevices between bolted-down seats. To get started, here are the supplies you will need:
- Soft detail brush
- A shop vacuum (with attachments)
- A steamer
- Soft microfiber cloth
- A compressor
Step 1. Prep The Car
Before starting any cleaning process, it is best to prepare the area by taking out every visible dirt or obstruction. You should remove things like papers, wrappers, receipts, books, keys, etc., from the car.
Step 2. Adjust The Seat Appropriately
If you have a relatively new car, you should be able to move the seats back and forth. Move the seat back to expose the space that you could not reach.
Step 3. Clean Out The Exposed Place
Once the space has been exposed, it is important to use the right tools. Use a soft bristle brush to clear out the dirt, not a shop vacuum. Brush off gently to avoid damaging the car’s floor.
Step 4. Blow Out The Dirt Using A Compressor
Once the brush has cleaned out the dirt, the air compressor blows the dirt out of those tight corners and directs the compressor’s air to the console. This will blow out the dirt that is trapped in them.
Step 5. Clean The Other Side
Once the front area has been cleaned, move the chair towards the front until the back of the seat is well within reach. Open the backdoor and clean thoroughly from behind.
Step 6. Steam Clean Your Seats
Once the seats have been cleaned off, locate the spots where tough stains have lodged. Run the cleaner over the spots until the stain comes off.
Step 7. Leave It To Air Dry
Open up the car doors and leave them to dry naturally for a few hours. This may take some time to dry appropriately. It is essential to let the car seats dry properly to avoid a smell.
How To Clean The Center Consoles in Cars
We cannot effectively clean in between the car seats without adequately cleaning out the center consoles. Here is a list of supplies you need to clean out the consoles effectively:
- Microfiber cloth
- Leather brush
- Vacuum
- Compressed air/ blower
- Steam cleaner
- Detailing brushes
- Upholstery brush
Here are six steps to cleaning your car’s center console:
Step 1. Vacuum Up The Area
This step aims to vacuum up as much dirt and stains as possible. Use the highest power on the vacuum for crevices.
Step 2. Try Out The Cleaner
Before using the cleaner entirely on the center console, test it out on a hidden spot in the consoles. If you haven’t used the cleaner before, you should definitely test it out first. It is still advisable to test it out for cleaners you have used on your consoles prior. Cleaners can degrade over time, and so can the consoles.
Step 3. Apply The Right Cleaner
Not all cleaners are suitable for your console surface, and this is why you have to get the most appropriate cleaners. All-purpose cleaners for cars are usually the most advisable as they are suitable for virtually all car surfaces. Use the cleaner on the surface, scrub in and leave for a couple of minutes and wipe down with a clean rag.
Step 4. Use A Dressing
Apply dressing according to instruction. Dressings refer to the component of the cleaner which makes the car surface shine. It elevates the look of the surface and protects it from future damage. You want to use a dressing that is UV resistant and heat resistant. UV and heat are two factors that cause center consoles to degrade speedily.
Step 5. Scrub With Detailing Brush
Detailing brushes are best to scrub the consoles’ crevices and holes effectively. Leave the cleaning solution to sit for a moment or two in those spaces, wipe it off, and apply the dressing. If you have an old toothbrush or a cotton swab lying around, you can use it to get into the crevices. Be careful when using a detailing brush on car seats as this may cause damage.
Step 6. Wipe Down And Dry
Once the dressing is taken effect, wipe down the console’s surface and dust off all surfaces inside the car to remove stains. Leave the vehicle open to air dry.
How To Clean Out Car Seat Tracks
You cannot have done a thorough cleaning job on the car seats if you have not cleaned the tracks properly. Cleaning the tracks is best done when cleaning the car seats. Here are the supplies needed for the cleaning of car seat tracks:
- Vacuum
- Cleaning brush
- Paint brush
Step 1. Prep The Space
Clear out all obstructions and dirt. Remove your floor mats easily and move the seat back to access the tracks easily.
Step 2. Sweep Up The Dust
Cleaning brushes work well to sweep out the dust before you dispose of it. The more dust you can get off, the better for your vacuum. You don’t want to overburden the vacuum cleaner with dust that can be swept away.
Step 3. Vacuum The Tracks Area
Vacuum up the areas around the tracks with the crevice tool. Regular vacuum cannot access certain spots. This part requires some patience as tracks are more challenging to clean out than any other parts of the seat. You can also use the brush and vacuum simultaneously.
Step 4. Clean Around The Crevices
With the crevice tool attached to the vacuum, clean the crevices of the tracks. you can also use a toothbrush or paint brush for this. Dirt has a way of getting stuck within folds and crevices, and they can be hard to see and even harder to clean.
How To Clean Car Seat Folds And Crevices

When you wipe your seats with a damp cloth, it looks clean, but it is not properly cleaned. Here are some supplies you would need to do a proper cleaning:
- A crevice tool
- Vacuum cleaner
- Upholstery cleaner
- Microfiber towels
- Compressed air dusters
- Soft Interior brush
Step 1. Vacuum The Back Of The Seats
Using a vacuum, reach to the back and bottom of the seats to remove loose dirt and grime from the upholstery. This will prevent them from falling back into the folds once the process is done.
Step 2. Vacuum The Folds With A Crevice Tool
Attach a crevice tool and vacuum around the folds of the seats using your hands to open the crevices. Ensure that you carry out a thorough job by reaching out to the back of the bottom of the seats.
Step 3. Apply The Upholstery Cleaner
Use an upholstery cleaner and an interior brush to remove residual dirt from the folds. This will help with deep cleaning as vacuums only extract surface dust. You can use a brush or a compressed air duster to complete the deep cleaning procedure.
Step 4. Wipe Down The Seat
Using a microfiber towel, wipe down the seats carefully and intently. After wiping, vacuum the area again to remove dirt that may have settled on it from the wiping process.
How To Clean Your Car’s Back Seats
Cleaning out the backseat can be trickier to clean than the front seats. This is because there is no way to access the back of the seats. For cleaning out the backseat, these are the things you would need:
- Crevice tool
- Detailing brush
- Microfiber cloth
- Steam cleaner
- Vacuum cleaner
- Upholstery cleaner
Step 1. Vacuum The Seats
Vacuuming the seats will ensure that all dust and mite have been adequately removed. When vacuuming, censure to reach between notches and sides, etc.
Step 2. Use A Special Crevice Tool
Crevice tools can come with vacuum cleaners or can be bought separately. Use these tools to clean out the spaces between the seats, behind, between folds, and on the sides.
Step 3. Clean With An Upholstery Cleaner
For tougher stains, you would need to use an upholstery cleaner. Scrub the spots with the detailing brush until you can get every stain out. You may also clean the entire seat with this cleaner if necessary. Doing this may soak up the entire seat, so use it carefully.
Step 4. Wipe Down And Leave To Dry
Sipe down the seats with a microfiber cloth and leave the car open to air dry.
How To Clean Tight Spots Around The Car Seats
When dealing with other tight spots around the car seats, there are a couple of things to note:
- Vacuums now come with crevice tools, and they are flat tools that work well to slide between crevices. Simply swipe between the seats and surrounding the center console.
- Some vacuums also come with extensions that allow the use of a hose. When cleaning underneath the car seats, these can come in very handy.
- Get a soft-bristle brush or a toothbrush and use it to finish up the process.
- When cleaning vents, an interior detailing brush can be used. You can also use it for the radio area and instrument panels.
- Use compressed air to push off dust out of crevices and other hidden spots.
- Always wipe down the area with a damp microfiber cloth.
How To Remove Car Seats For Cleaning
Removing vehicle seats is not as difficult as you may believe. All you need is a little time and attention to detail. Cleaning your car seats is much easier when you remove them rather than having to slide them back and forth.
This technique may differ significantly from one vehicle to the next. If you have a power seat, you may need to keep the battery connected in order for the seats to move. You’ll need a set of mechanical tools for this.
Step 1. Move The Car Seat
Push the seat forward and look for the two bolts behind the chair.
Step 2. Uncover The Screws Beneath The Surface
For safety, the screws on certain recent models of the car are covered. Unscrew the screws and remove the plastic cover.
Step 3. Unscrew The Screws
Carefully remove the bolts at each end of the seat with a screwdriver.
Step 4. Slide The Seats Back
Slide the seat back to uncover the two bolts in front of the seat rails with the same tools you used to remove the screws on both ends.
Step 5. Disconnect The Battery
Before continuing, unplug the batteries and remove the key from the ignition in automobiles with power seats. Failure to do so may result in the activation of the airbag and the SRS signal.
Step 6. Raise The Seat
To keep the seat slanted over in the front position, gently lift the seat from behind. This may necessitate the assistance of a helper.
Step 7. Disconnect The Cables
The electric cables can now be disconnected in a systematic manner once the seat has been properly positioned forward. Begin with the ones that are visible, then work your way down to the cables beneath the seat. To avoid destroying a cable, avoid tugging on it.
Step 8. Remove The Seat From The Car
You can now ultimately remove the seat from the car to reveal the cleaning area once all cables have been disconnected.
Things To Note About Cleaning Between Car Seats

- Avoid washing the car interiors with harsh chemicals or equipment, which may damage the car’s interior.
- Clean car components delicately as they are made of special material.
- Depending on the car’s interior, be careful using harsh brushes. They may pull out fabrics from the car seats. You want a clean car, not a disfigured one.
- Avoid using weighted, sharp, or strong gadgets as they may cause bodily injury. It’s important to protect yourself at all times.
- Since it may take a while to clean and even longer to dry your car, park it in a safe spot where it is protected from the elements.
- While cleaning car seat tracks, avoid cleaning off lubricant. If not, you may have to lubricate them once you are done cleaning.
FAQs About Cleaning Between Car Seats
How Long Will It Take To Clean Between My Cars?
Cleaning between the car seats is a complex process that may take between an hour to two hours. Depending on how deep you want your cleaning to be.
How Often Should I Clean Out Car Seats?
Cleaning car seats should be done fairly regularly, depending on the use of the car. Have a deep clean procedure at least once a year for private cars. Commercial use cars should be cleaned more often.
Can I Use The Same Process For Fabric And Leather Seats?
Cleaning fabric seats and leather seats require slightly different processes. You may need a little bit of research on what works for your specific chair type.
How Do You Vacuum A Small Crevice In A Car?
Start from the top of the seat and vacuum all the way down as much dirt as you can. You can put a brush attachment to the end of the vacuum. This will pick up the dirt as well as dust.
How Do You Get Crumbs Out Of Car Seats?
An effective way to get crumbs out of leather seats is to use an old toothbrush. You can also sprinkle baking soda on the surface of the seat with a little bit of water. Scrub away the baking soda and leave to dry.
What Products Do Car Detailers Use?
Depending on the type of seat, products like DeWalt DXVO8S are a vacuum designed specifically for indoor detailing. A microfiber towel is also a top detailer’s choice, as well as car drying towels. There are three types of wax for cars: spray, paste, and liquid wax.