
A’ tile deep clean’ is required to remove the ugly coat from your 1950s tile surface. This requires using warm water, applying cleaning products (like vinegar-based solutions), cleaning grouts, scrubbing, and mopping to breathe new life into your old tiles again.
Reviving Your 1950s Floor Tiles
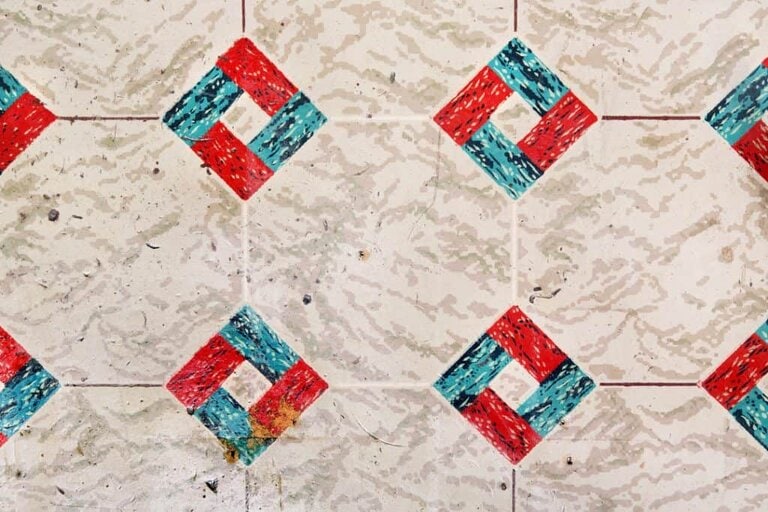
If you moved into a house built in the 1950s, you probably enjoy the luxury of sophisticated building architecture such as mosaics and vintage tiles.
However, one of the issues you are likely to encounter in a home that old is a dirty and muddy tile surface that refuses to go away no matter how hard you clean it.
Old tiles and grout are notoriously difficult to clean, but you can do it seamlessly using this guide and the right tools.
Materials Needed
- Sweeper
- Mop
- Vacuum
- Brush
- Protective hand gloves
- Cleaning solutions
- Bucket and Water
It’s also important to know the tiles in your home to ensure that you get the cleaning agents best suited to your type of tiles.
Types of Tile Cleaning Products:
- Non-acidic commercial cleaning products: These are suitable for marble, travertine, limestone, or natural stone tiles
- Vinegar-based products: I recommend these cleaning agents for ceramic, porcelain, and cement tiles
Now that you have the necessary tools and cleaning products, you’re ready to restore your old tiles’ gleaming cleanliness.
The Step-By-Step Guide To Cleaning Your 1950s Floor Tiles
With these seven easy steps, you can have your 1950s floor tiles shining like new!
Step One: Dry Clean The Floor Using Soft Brush and Vacuum
The first step in deep cleaning your 1950s floor tiles is to do a simple sweep of the entire room.
- Remove all furniture and appliances from the room where the tiles are located.
- Use a soft-bristled brush to remove dirt and debris from the tile’s surface.
- Then use a vacuum cleaner to suck up any remaining dust hidden in tight corners.
Precautions
- Avoid using brooms with harsh bristles to avoid damage to the flooring
- Do not apply pressure to areas where there is grout
The first dry-clean helps to ensure that any subsequent scrubbing (even with a soft sponge) does not scratch your tile.
Step Two: Wet Clean The Floor Using Warm water and a Mop
- First, use warm water and a sponge to wet the floor.
- Wipe the floor gently with a towel or mop if there is excess water.
- Leave for a few minutes to allow the tiles to open up and expose the dirt for easy cleaning
Precautions:
- Do not scrub the tiles to avoid structural damages
- Avoid excess water to prevent over-saturation
Step Three: Apply Tile Cleaner
Depending on your type of tiles, you can use a commercial tile cleaning chemical or easy homemade alternatives, such as baking soda or white vinegar.
- Mix 1 cup of vinegar with 1 gallon of warm water and a few drops of dish soap. Or mix 2-3 cups of baking soda with a little water.
- Pour this mixture into a spray bottle and use it on the floor tiles.
- Let the mixture sit on the tiles for about 10 minutes.
Precautions
- Avoid using acidic chemicals on your antique tiles
- Use your cleaner on a test tile before applying it to the entire floor to avoid color fading or any other damage
- Ensure as much ventilation as possible when cleaning
Step Four: Clean Grout
There are a variety of modern grout cleaners available, some of which include latex and other polymers. However, alkaline cleaners are generally more effective at removing stubborn grout lines.
- Spray the cleaner on the grout and let it sit for a few minutes
- Scrub a small section of the grout line at a time with a stiff-bristled brush, and wipe with a towel as you go
Precautions
- Avoid using bleach except in extreme instances
- If you choose bleach as your cleaner, use gloves to protect your hands
Step Five: Rinse with Clean Water
- After applying the tile and grout cleaner, rinse the tile with clean, warm water.
- Change the cleaning water regularly to avoid spreading dirt
If you observe a dirty spot on a tile surface after rinsing, reapply the bleach and scrub with more pressure. Then, mop again until all traces of the stain are gone.
Step Six: Dry The Tiles
Drying the tile reduces the formation of a haze caused by the remaining cleaning product residue.
- Wipe down the entire tile surface with a clean, dry cloth.
- Move swiftly and systematically before some parts begin to air-dry
Precautions
- Do not allow your floor tile to air dry, as this may increase the likelihood of mold formation. It may also allow excess moisture to soak into the grout, causing the grout lines to crack.

Step Seven: Seal The Tiles
Although it is optional, sealing the tiles can help protect them from absorbing stains after washing. You can use clear floor enamel as your sealant in some cases, and depending on the type of antique tile floor, you may also be able to add clear wax.
Frequently Asked Questions
Is Grout Cleaning Worth It?
Yes, it is. Grout is porous and absorbs water. If the grout in your home is not cleaned, it will lead to mold growth, causing allergic reactions, discoloration of the grout, and cracks in the tiles.
How Often Should I Clean My Tile And Grout?
Clean your tiles at least once a week to avoid letting stains sit on tile flooring. Unfortunately, grout is very porous and will stain easily, so a deep tile cleaning every month or two is necessary.
What is the best tile cleaner?
The best tile cleaner depends on what type of floor tiles you have, its cleaning requirements, and the level of grime you’re trying to remove. Other factors to consider are the color of the tiles and the type of grout. Some cleaners are best suited for epoxy grouts than fine sanded, or quarry.
