
Put 8 to 16 ounces of vinegar in your water tank at night and let it stay in it for 5 to 7 hours. Next, turn on the steam mop in the morning and allow the vinegar to boil inside the tank for 10 minutes. Lastly, pour it out of your tank and wash it with cold water under the sink.
Every appliance in your home requires maintenance to stay in good shape, and steam mops are no different.
Cleaning your steam mop every time you use it is crucial, so you get a good 2 to 3 years of use out of it. For this period, your floors will stay spotless and save you money as you won’t have to hire professional cleaners.
The good news is that you won’t have to spend much time washing your steam mop. Our steps below are concise and easy to understand so you can get on with your day.
With a frequent maintenance schedule, your steam mop will function whenever you need it. This guide will allow you to clean any model with the latest techniques.
How to Clean Your Steam Mop
Our simple guide consists of the 6 steps you need to clean your steam mop effectively every time you finish using it.
Step by Step Instructions
Step 1: Unplug the Steam Mop
For safety reasons, ensure the steam mop is unplugged from the electrical outlet before getting started.
Accidents happen when you are not careful and expose your mop to water while plugged in. Also, be extra cautious with models that automatically turn on and discharge hot water when you plug them into the electric socket.
At temperatures of around 250 to 350 degrees Fahrenheit, this steam water will burn your skin and leave a possible scar.
Lastly, if you just finished using your steam mop, give it 20 to 30 minutes before you clean it, so it’s no longer hot.
Step 2: Remove Water from the Tank
Never leave water inside the tank after you finish using your steam mop. It looks harmless because you think you will eventually use it again, but it’s a bad habit.
Leaving water in your tank while the steam mop is not in use will eventually cause it to malfunction. The leftover water will erode your appliance, and you will lose money having to replace it more often with a new one.
Another reason this is a bad idea is that mold will begin to grow inside the tank.
Mold thrives in hot and moist environments, producing spores that circulate quickly. It also leaves behind a terrible smell that is hard to eliminate once it’s been around for longer than 3 to 5 days.
Therefore, it’s recommended to drain your water tank after cleaning with a steam mop, even if a minimal amount remains in it.
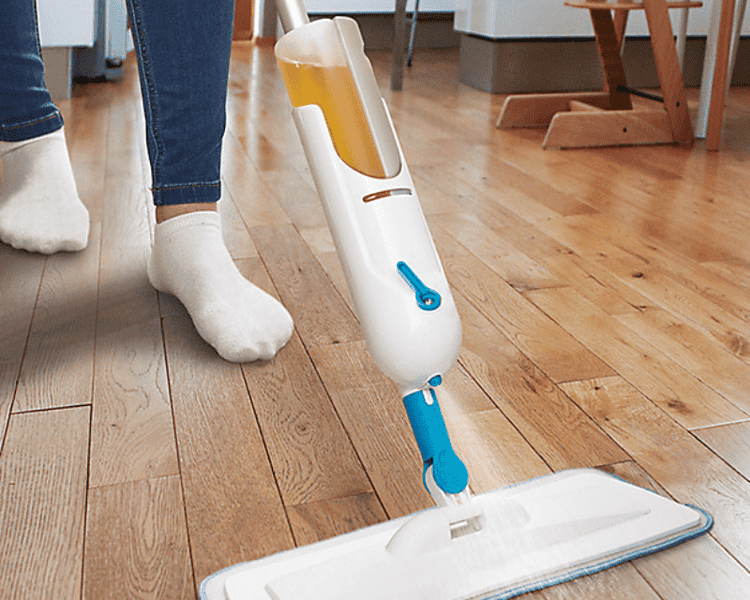
Step 3: Clean Your Water Tank
Completing this step will be more straightforward if your steam mop has a removable water tank.
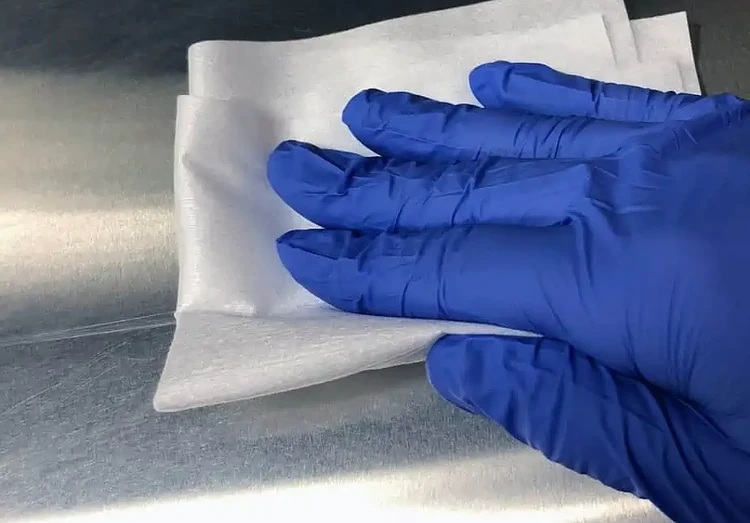
Start by wiping down the interior of your tank with a microfiber towel. You should be able to see accumulated grit and dust inside.
Your machine should have a good amount of scaling if you use a particular type of water. It will leave a smoky white appearance on the exposed parts of your appliance. Using vinegar to remove limescale is a great solution to this issue.
Due to vinegar’s inherent antibacterial characteristics, you don’t need to buy commercial cleaning products. If you go the vinegar route, ensure you neutralize its acidity with enough water. A good rule of thumb is to follow a 2:1 water to vinegar ratio.
Before reconnecting the water tank to your steam mop, dry it with a towel. Don’t refill it with water until you’re ready to use it again.
Tip: Note that vinegar is only effective for cleaning your water tank and not the floors in your home.
If you are a parent, keeping your floors free from pathogens and bacteria is a priority to protect your child’s health. Steam has the capacity to do this and works almost 100% of the time.
Step 4: Clean the Nozzles
On occasion, you should clean the nozzles on your steam mop.
It becomes more of a necessity if you put hard water in your water tank. Tap water contains limestones and minerals that clog up your nozzle after a certain period.
To prevent this, use distilled water to fill your tank so your nozzle will not accumulate mineral remnants. Without this residue, steam will come out of your steam mop at total capacity.
If you have any performance issues and your appliance stops producing steam, the culprit is usually a blocked nozzle. Purchasing a new one is an option, but you can still save the one you have. Start by detaching the mop head base to get to the nozzles.
Depending on the brand, you might need a screwdriver to remove the base plate. This scenario will be the case if you have a Bissell model since the nozzles are in the base area.
Looking at the nozzles, you will know if your problem is dirt buildup. Most times, using a Q-tip will be enough to solve this issue. But a slim pin is necessary to get it out if the dirt is deeper inside.
Several steam mops on the market come with customized accessories to help you unclog nozzles. A well famous brand that does this is Shark which includes a nozzle declogger. All you have to do is push the declogger in and out a few times to get the job done.
A paper clip will be enough to accomplish the same goal if no customized tool is supplied. Reconnect the mop head when you finish, and you can start cleaning.
Step 5: Replace or Clean Your Mop Pad
Washing your steam mop every time after using it should be a must. It will help kill bacteria and other pollutants that can spread on the pad.
But, of course, you can use disposable pads if you want to skip this step.
Most reusable cleaning pads are made with cotton, and you can use them multiple times. You can clean these pads using a bucket with soap detergent or throw them in your washing machine.
When handwashing, you will need 1 teaspoon of soap detergent. Combine it with 32 ounces of warm water in a bucket and let the mop head sit inside the solution for 30 to 45 minutes. Then, clean the soap off under your sink with fresh water.
Do not use Clorox or fabric softeners. They decrease the pad’s ability to soak up liquids, and you will need to replace them.
If you use your washing machine, the water inside must be at least 165°F to be able to kill microorganisms. Choose to handwash your pads if this is not the case.
Air drying is an option after washing your pads, but it’s risky. If you have the time to wait, air-drying them outside is the safest route and only takes 5 to 6 hours if it’s warm outdoors.
Letting it dry outside discourages mold growth and moisture buildup. It even ensures undesirable smells don’t creep up. Once it’s dry after leaving it out overnight, reconnect it to your mop head.
If the steam mop you bought came with its own instructions, we always recommend you follow their guide to the tee instead of following a generic one.
Step 6: Wipe the Surface of Your Steam Mop
The final step is simple and takes only a few minutes.
Wipe around the surface of your steam mop. Making sure it’s completely dry is essential if you don’t want mold to take over. Always inspect the base because it’s usually exposed to moisture from your mop pad.
Use a clean microfiber towel to complete this step, and you can store it in your closet when you finish.
FAQS on How to Clean Your Steam Mop
Can I put vinegar in my steam mop?
Using regular soap and water is often enough to clean your floors. But if you want to make it more potent, using vinegar to clean your floor helps for stubborn stains.
How often do you need to descale a steam mop?
Depending on how often you use it, most people descale their steam mops every 2 to 4 weeks. The more often you do this, the better.
Why does my steamer smell?
The reason for the smell is often because of dirty water or mold that grows inside the water tank. Frequent cleanings will help avoid this situation.